Day 2
Resources
Prerequisites
This exercise picks up where Day 1 left off.
Airplane Mode - Remodelled, Controlled, Online
Now that you are equipped with the knowledge of controller methods/document hooks, web views, web forms, and more. It is time for us to take the Airplane Mode app to the next level ✨
Let’s start simple
Your goal here is add a new field named Full Name (read-only) to the Flight Passenger DocType and auto set it based on the First Name and Last Name field before the document is saved to the database. Write some Python code to achieve this.
More fun: Add-Ons
If you have booked a flight ticket before, you will probably know about Add-ons. For example, along with an Airplane ticket, you can buy a in-flight meal, special seat etc. These are examples of some add-ons on our ticket. Since, this can be N in number and only exist along a ticket, the thing that comes to mind is a Child Table!
For this part of the exercise, your task is to create a new Child table doctype and add it as a table in the Airplane Ticket doctype.
New DocType: Airplane Ticket Add-on Type
Before we create the child table doctype, let us create a new doctype that stores the list of available add-ons, we can then link this to a field in our child table doctype:
Name
Airplane Ticket Add-on Type
Naming Rule
Set by user
Fields
- Description: Data, description about the add-on
Dear Child… Table
Here are the specifications for the child table doctype:
Name
Airplane Ticket Add-on Item
Fields
- Item: Link to
Airplane Ticket Add-on Type, Mandatory - Amount: Currency, default 0
Now go ahead and add a table field in the Airplane Ticket DocType that uses this child table doctype you just created. The name of the table field must be add_ons.
More Controllers
What we want now is to calculate the total amount for the ticket by adding all the add-on amounts as well as the flight price. Start by adding 2 new fields to the Airplane Ticket DocType:
- Flight Price: Currency, Mandatory
- Total Amount: Currency
After you have added the above two fields, go ahead and write the logic that populates the Total Amount as follows:
Total Amount = Flight Price + Sum of amounts of all the add-onsSweet!
But there is a slight issue here, we don’t want the user to add an add-on more than once, i.e. each type of add on in the add_ons child table should be unique. You know what to do right? Go ahead and write some logic that removes duplicate entries from it while the document is validated!
All Aboard
Write a document hook to prevent the submission of the Airplane Ticket document if the status is not equal to Boarded.
Refactoring
If you recall, the Airplane Ticket is linked to an Airplane via a Link Field. But that is not the right way to do it. If you think about it, an Airplane takes multiple flights, and it is the flight that the passenger is booking, not an airplane itself.
So, our task now is add a new DocType named Airplane Flight and refactor existing DocTypes.
The Airplane Flight DocType
This DocType will be used to track flights. Be sure to make this a submittable DocType, as we will mark this complete once the document is submitted.
Name
Airplane Flight
Naming Rule
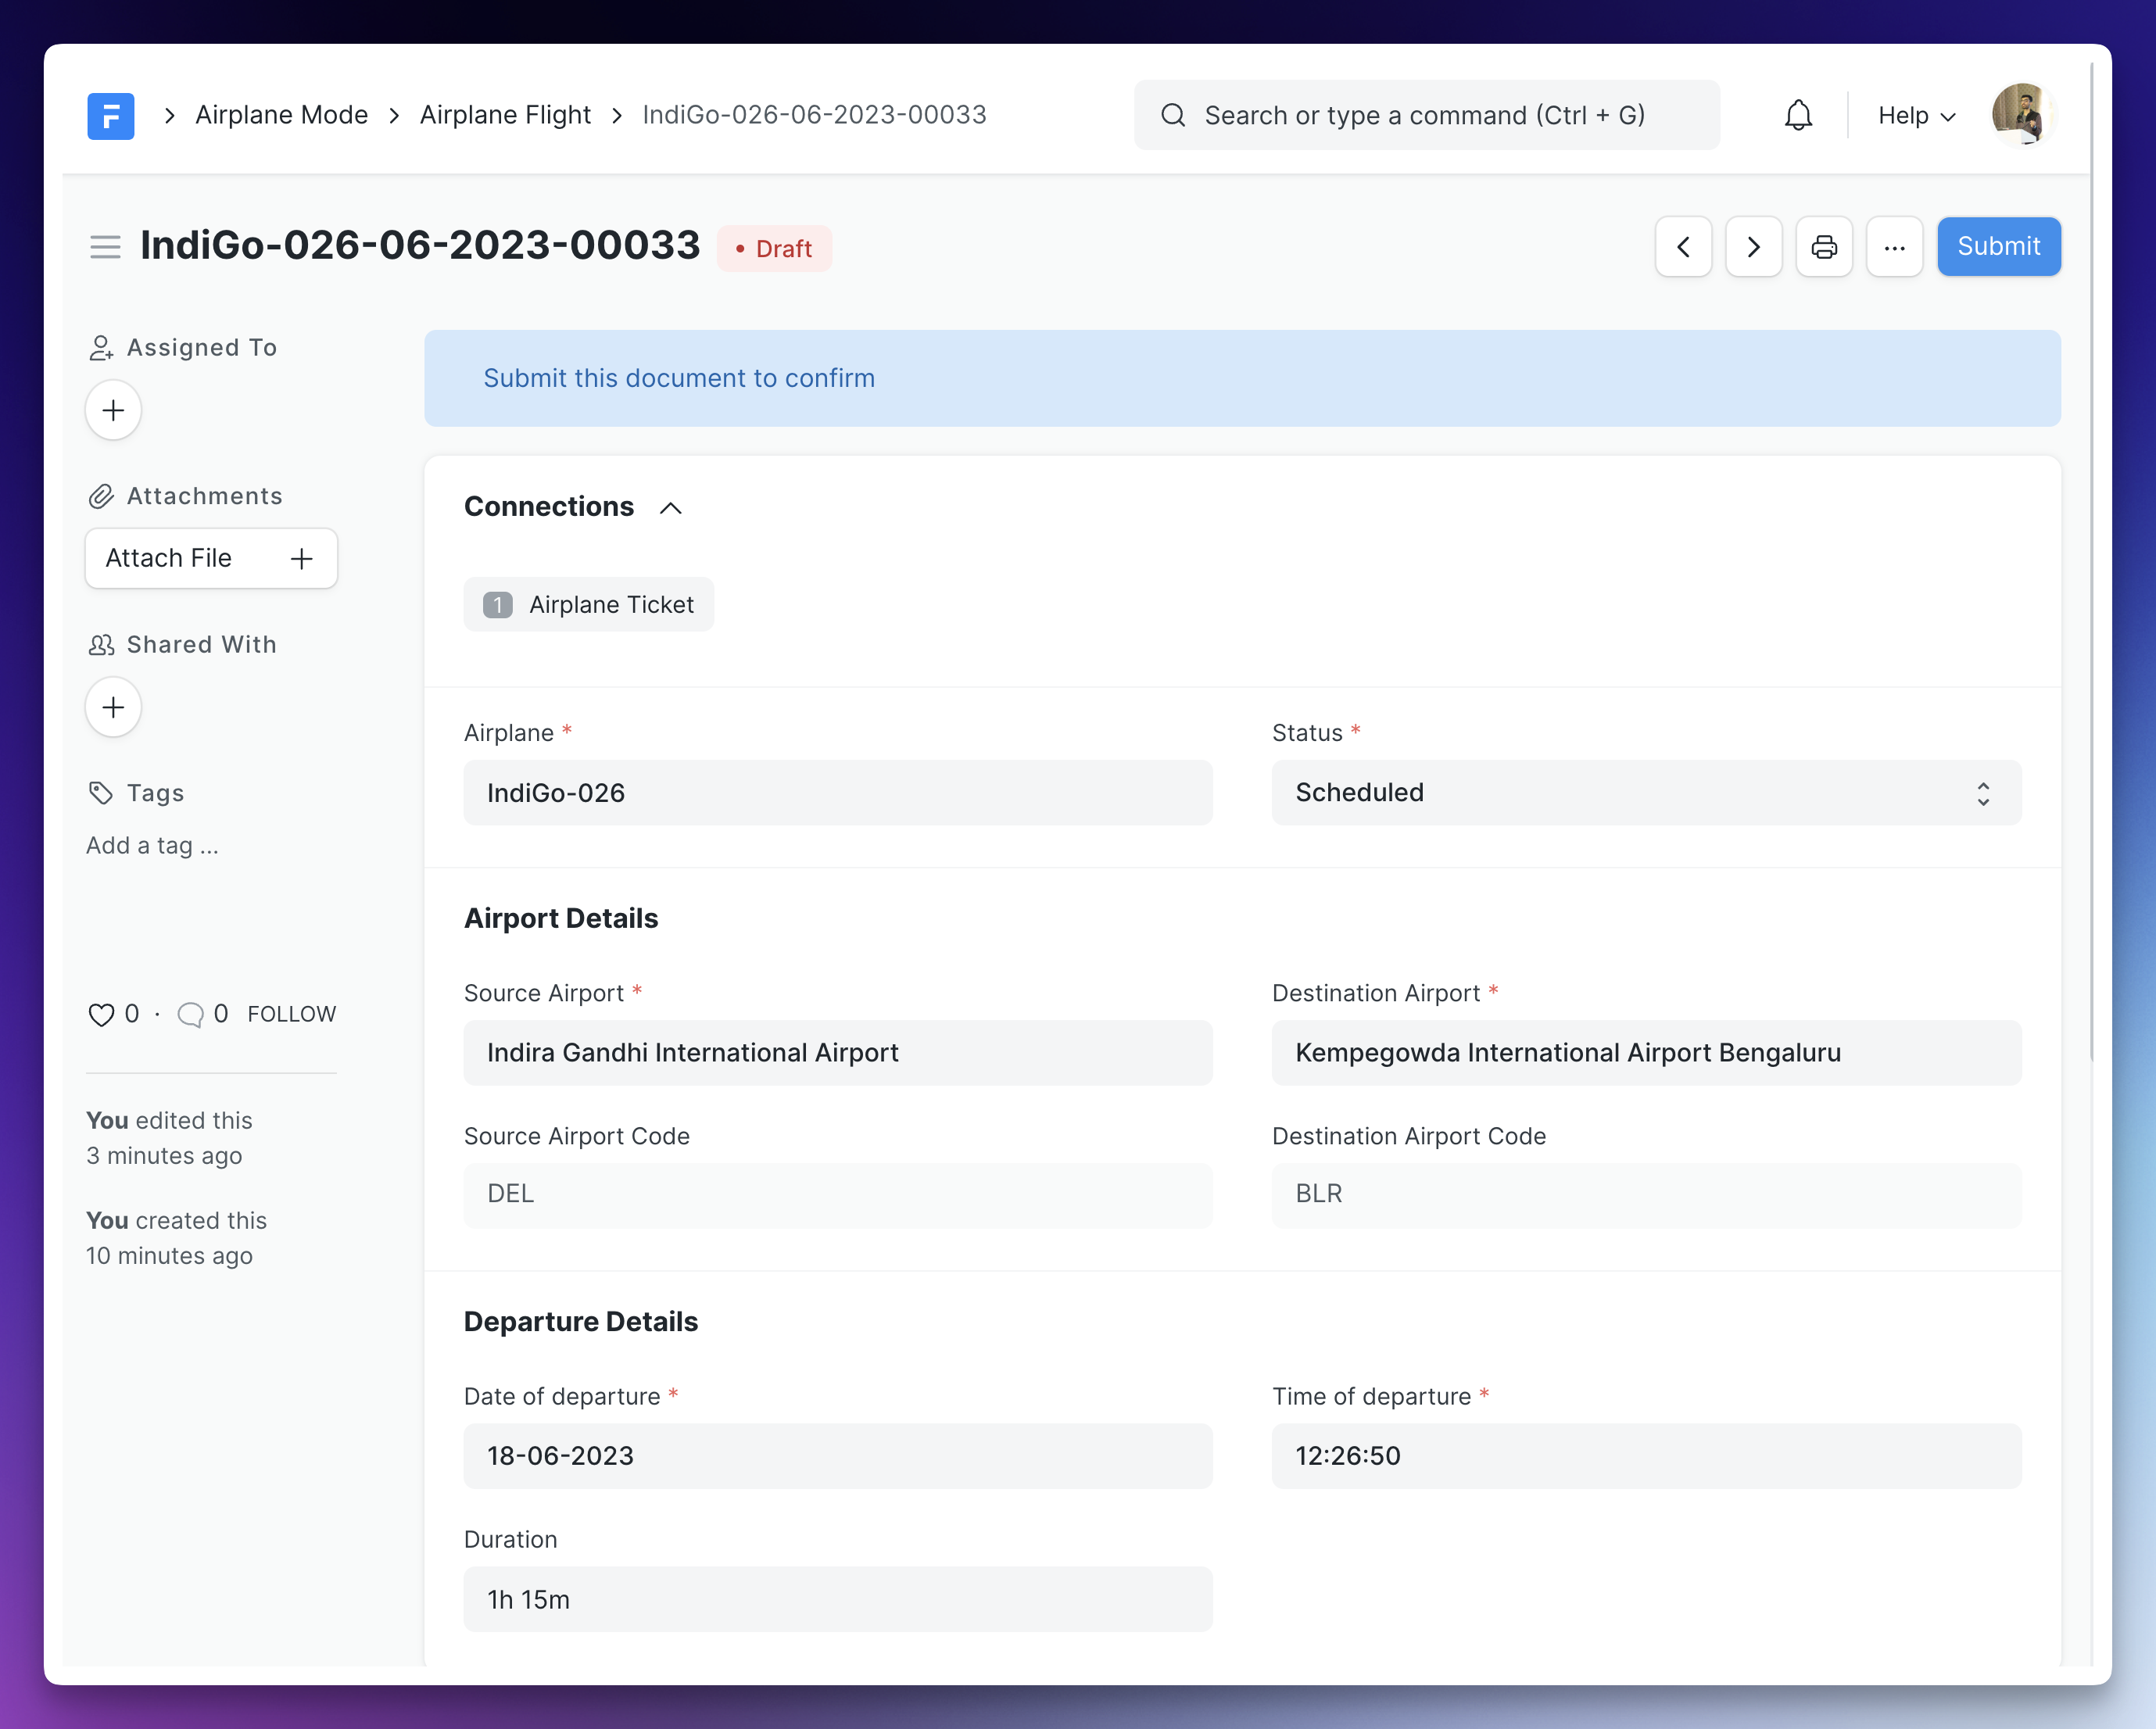
Expression that generates names like: IndiGo-001-06-2023-00001 where IndiGo-001 is the Airplane name and 06-2023 are the month and year when this document is created.
Fields
- Airplane: Link to Airplane DocType, Mandatory
- Date of Departure: Date, Mandatory
- Time of Departure: Time, Mandatory
- Duration: Duration, Mandatory
- Status: Select, Options (
Scheduled,Completed,Cancelled), default isScheduled.
Go ahead save the DocType now, we will come back and add more fields soon.
Changes to Airplane Ticket
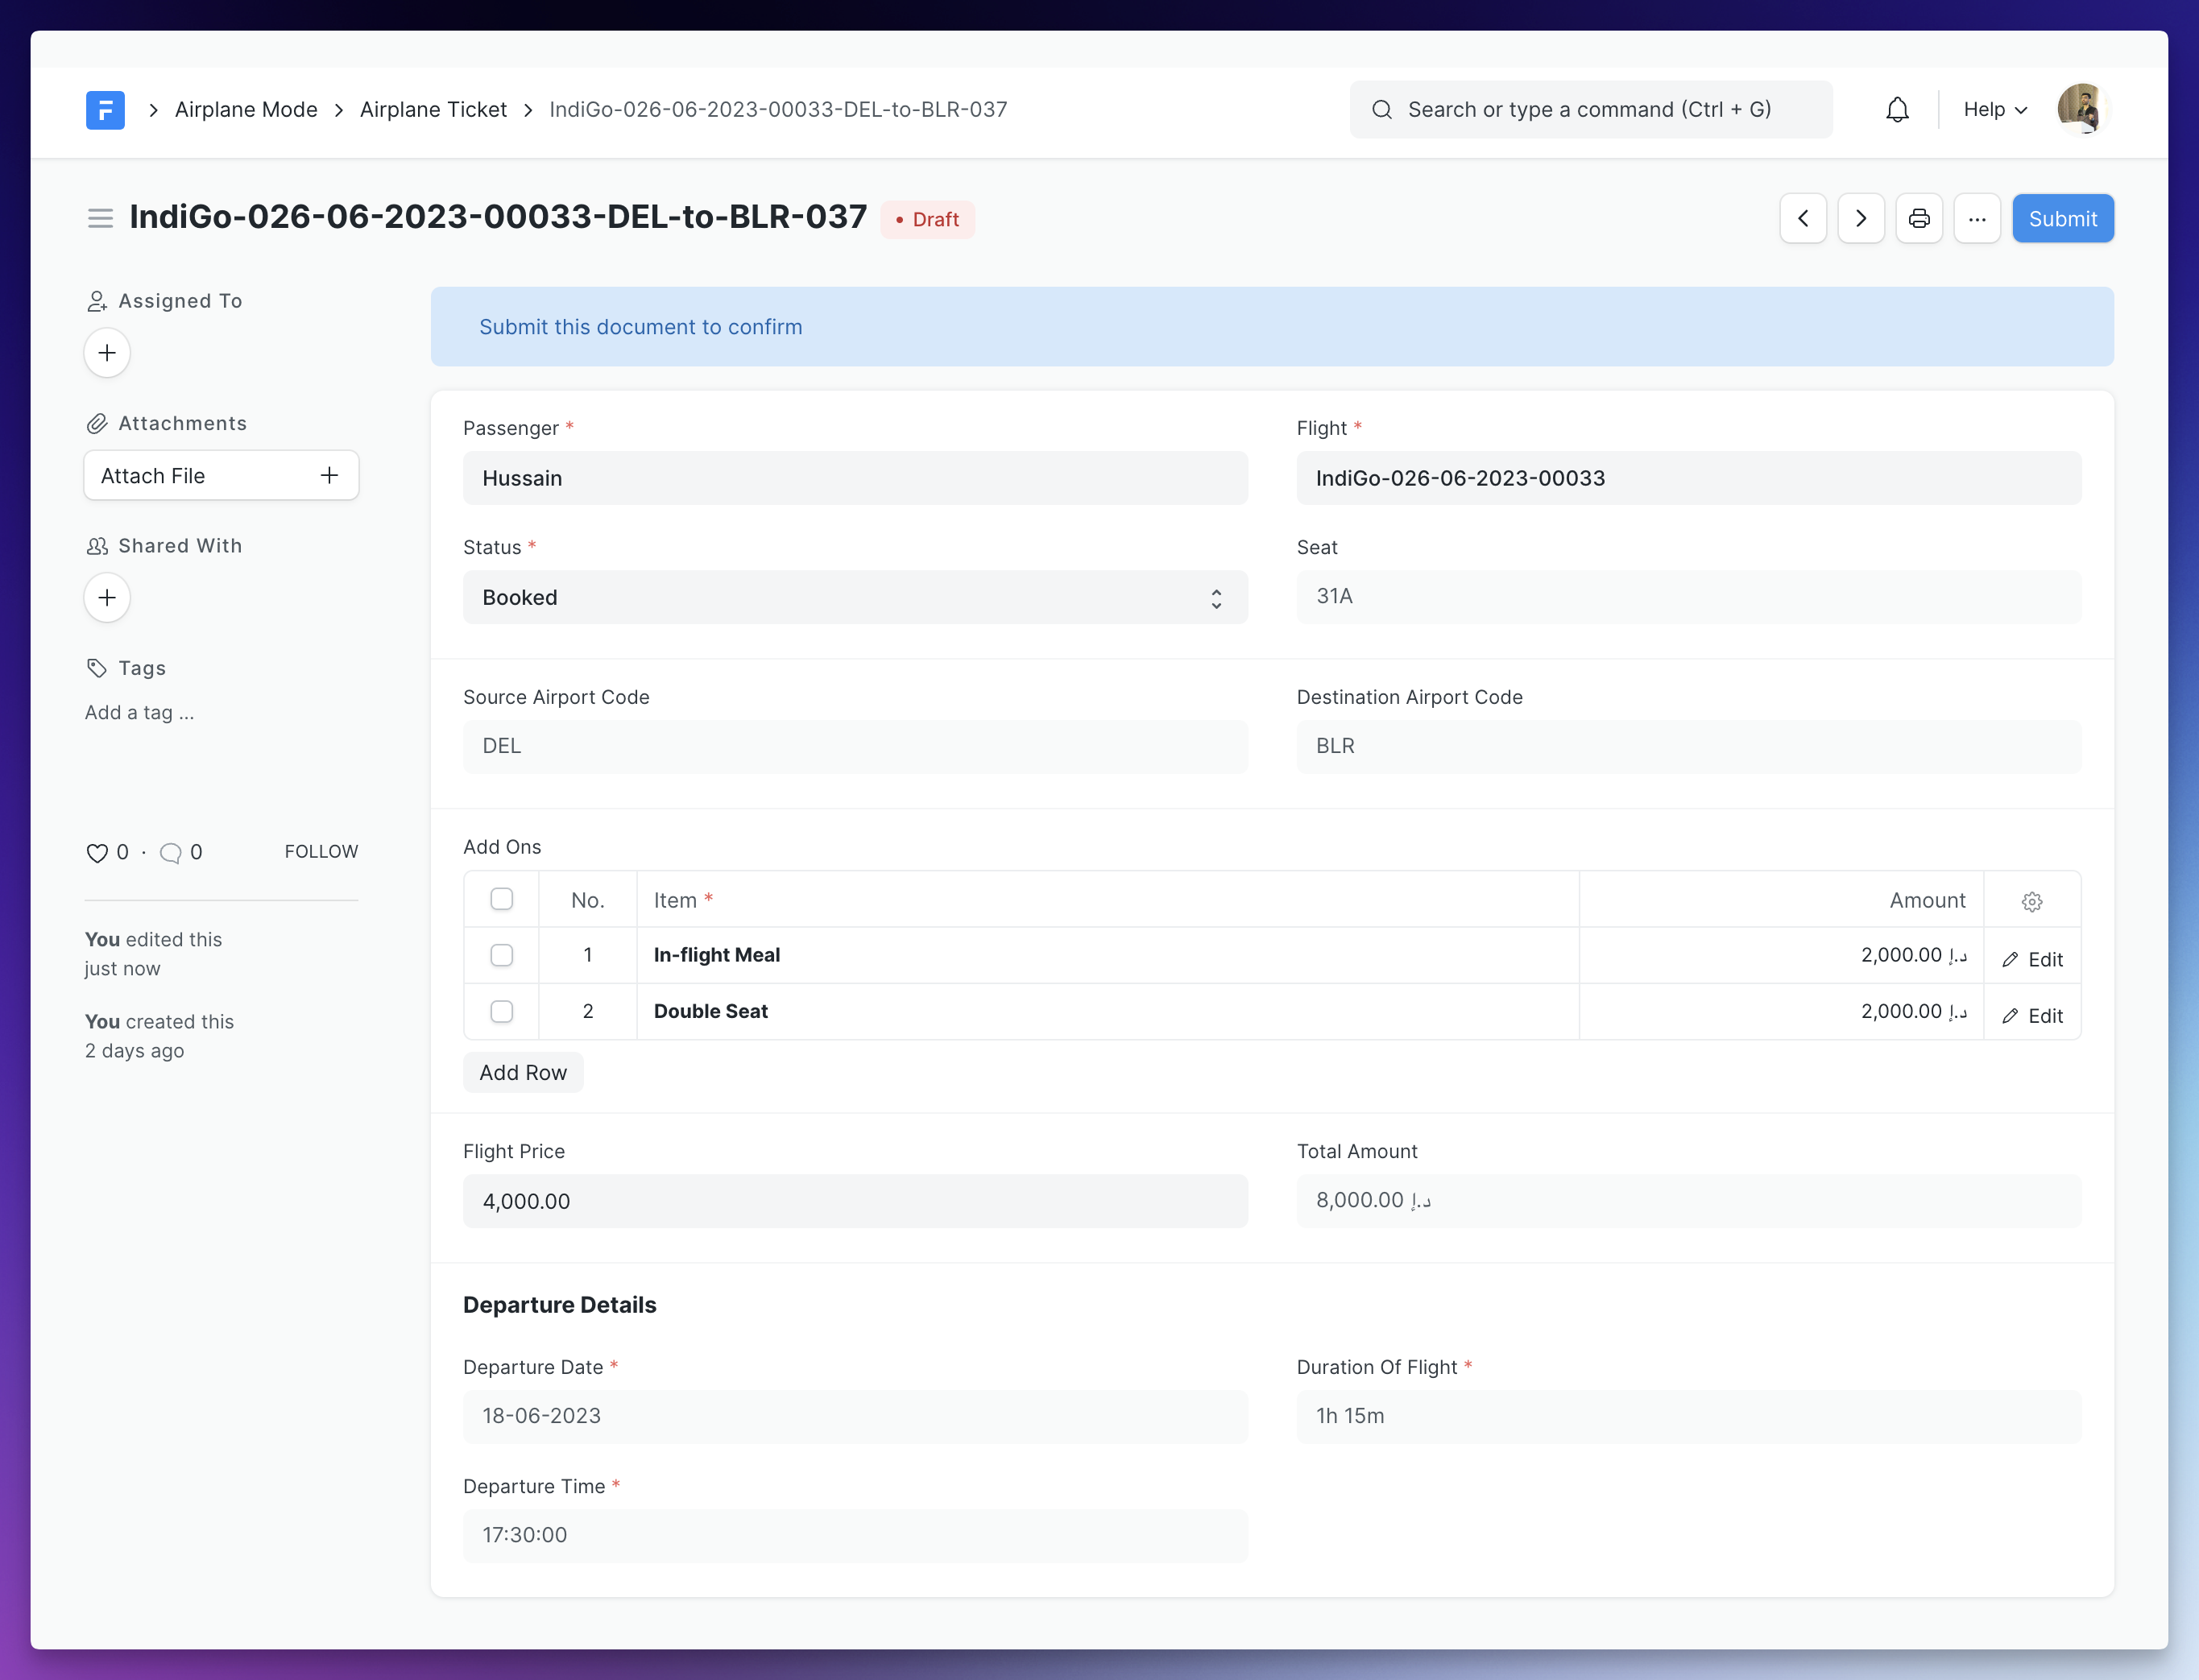
Change the link of the flight field from Airplane to Airplane Flight. Now you know why we named it flight 😉
Since, the date of departure, time of departure and duration are now stored in the flight, fetch it from the linked Airplane Flight. I hope you remember our Fetch From feature!
One more thing you should do here is to move the airport link fields to the Airplane Flight DocType:
- Source Airport, Mandatory
- Destination Airport, Mandatory
and create 2 new fields in the Airplane Flight Doctype:
- Source Airport Code, Fetch from
Source Airport - Destination Airport Code, Fetch from
Destination Airport
Now, update the Source Airport Code and Destination Airport Code in the Airplane Ticket doctype to fetch them from the Airplane Flight doctype instead.
While we are here, go ahead and add an new Data field to our airplane ticket DocType named Seat, which will be used to track the seat (e.g. 2A, 31C etc.) assigned to the passenger. Make this read-only, as we are going to automatically assign this via code.
The End Result
After you are done with the above mentioned changes, the Airplane Flight form view should look identical to the screenshot below:
Here is how the updated Airplane Ticket looks like:
Phew! That was some work. But we are done now and the application is better modelled!
A Few More Controllers
Write Python/Controller code to achieve the following outcome:
-
The Seat field of the
Airplane TicketDocType should be set to a string of the form:<random-integer><random-capital-alphabet-from-A-to-E>. For example,89E,21A, etc. The field should be set before a new flight ticket document is inserted into the database. You may be interested in reading the docs for Python’s random module, sections9.6.2and9.6.3in specific. -
Set the Status field of the
Airplane FlightDocType toCompletedafter the document is submitted.
Patch it up!
Imagine this scenario: a lot of people have already installed your app and have created tickets after Day 1. Now that you have added a new field for seat, we want to populate it automatically for existing installations (think why it won’t automatically populate?). If you thought about patches, patch yourselves on the back!
Your task is to write a patch (think which type you will need to write) that populates the seat field of all the existing Airplane Ticket documents according to the rule we discussed in the previous task.
You MUST name your patch file populate_seats.py.
Essential Reading
It is better to go through the essential reading before you proceed to the next exercise.
Exercise: Show Me Colors
For this exercise, your task is to create a web page that takes in a color as query parameter and shows a rectangle of that color on the page. For example, if the user visits: <your-site>/show-me?color=red, they should see a red colored rectangle. If they visit <your-site>/show-me?color=green, they should see a green colored rectangle.
If no color query parameter is provided, a black rectangle must be shown.
Note: You can assume it is always a valid HTML/Web color name.
The end result should be:
Web View Pages For Flights
Now it is time to let users browse and book flights from our website. This will be very simple as compared to the complex ticketing systems out there but will help us grasp web view concepts!
Your task here is to build web view pages for the Airplane Flight DocType. This will be very similar to what we did with the Vehicle DocType during the training session:
-
A list page at
/flightsthat shows the list of all flights. Each list item should display the source airport code, destination airport code, date of departure, time of departure and duration of the flight. A View Flight link that takes the user to the detail page of that particular flight. -
The detail page for each flight at the route coming from the
routefield of theAirplane Flightdocument. A Book Flight link should be shown that takes the user to a web form we are going to build in the next section. -
The is published field for the web view must be named “Is Published?” (
is_published).
The look of the pages does not matter as long as they display the required information. Here are the sample pages:
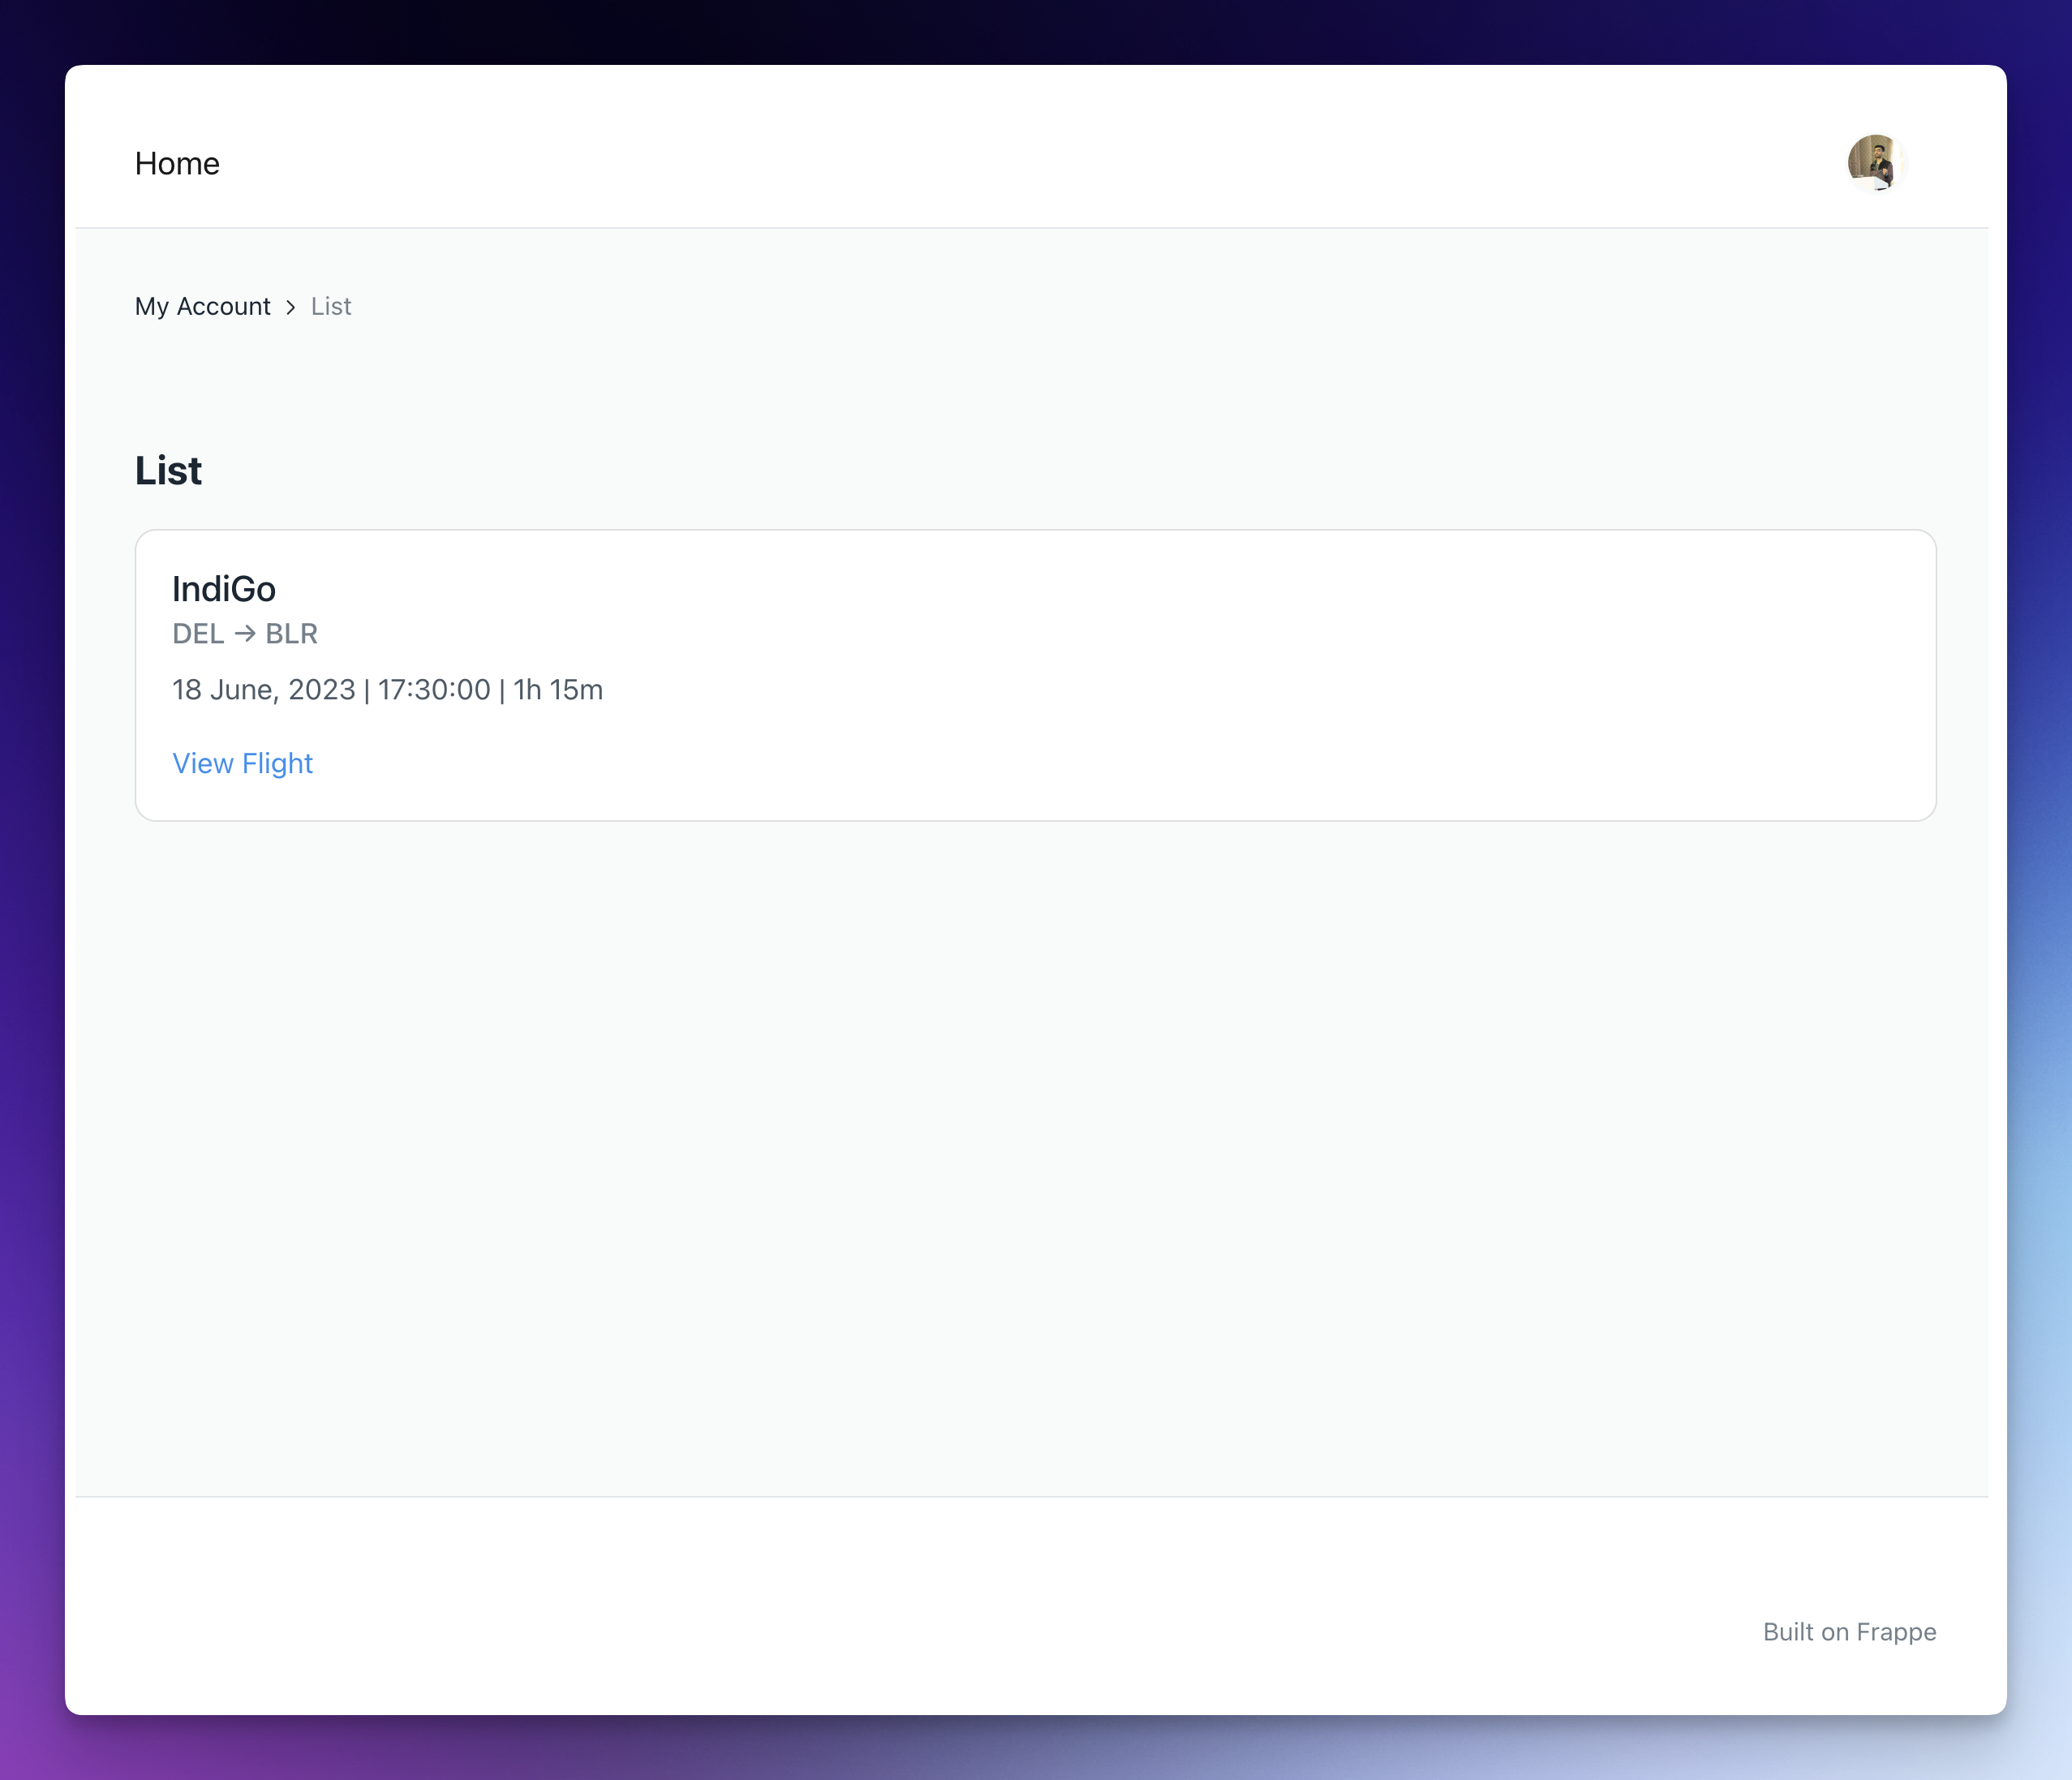
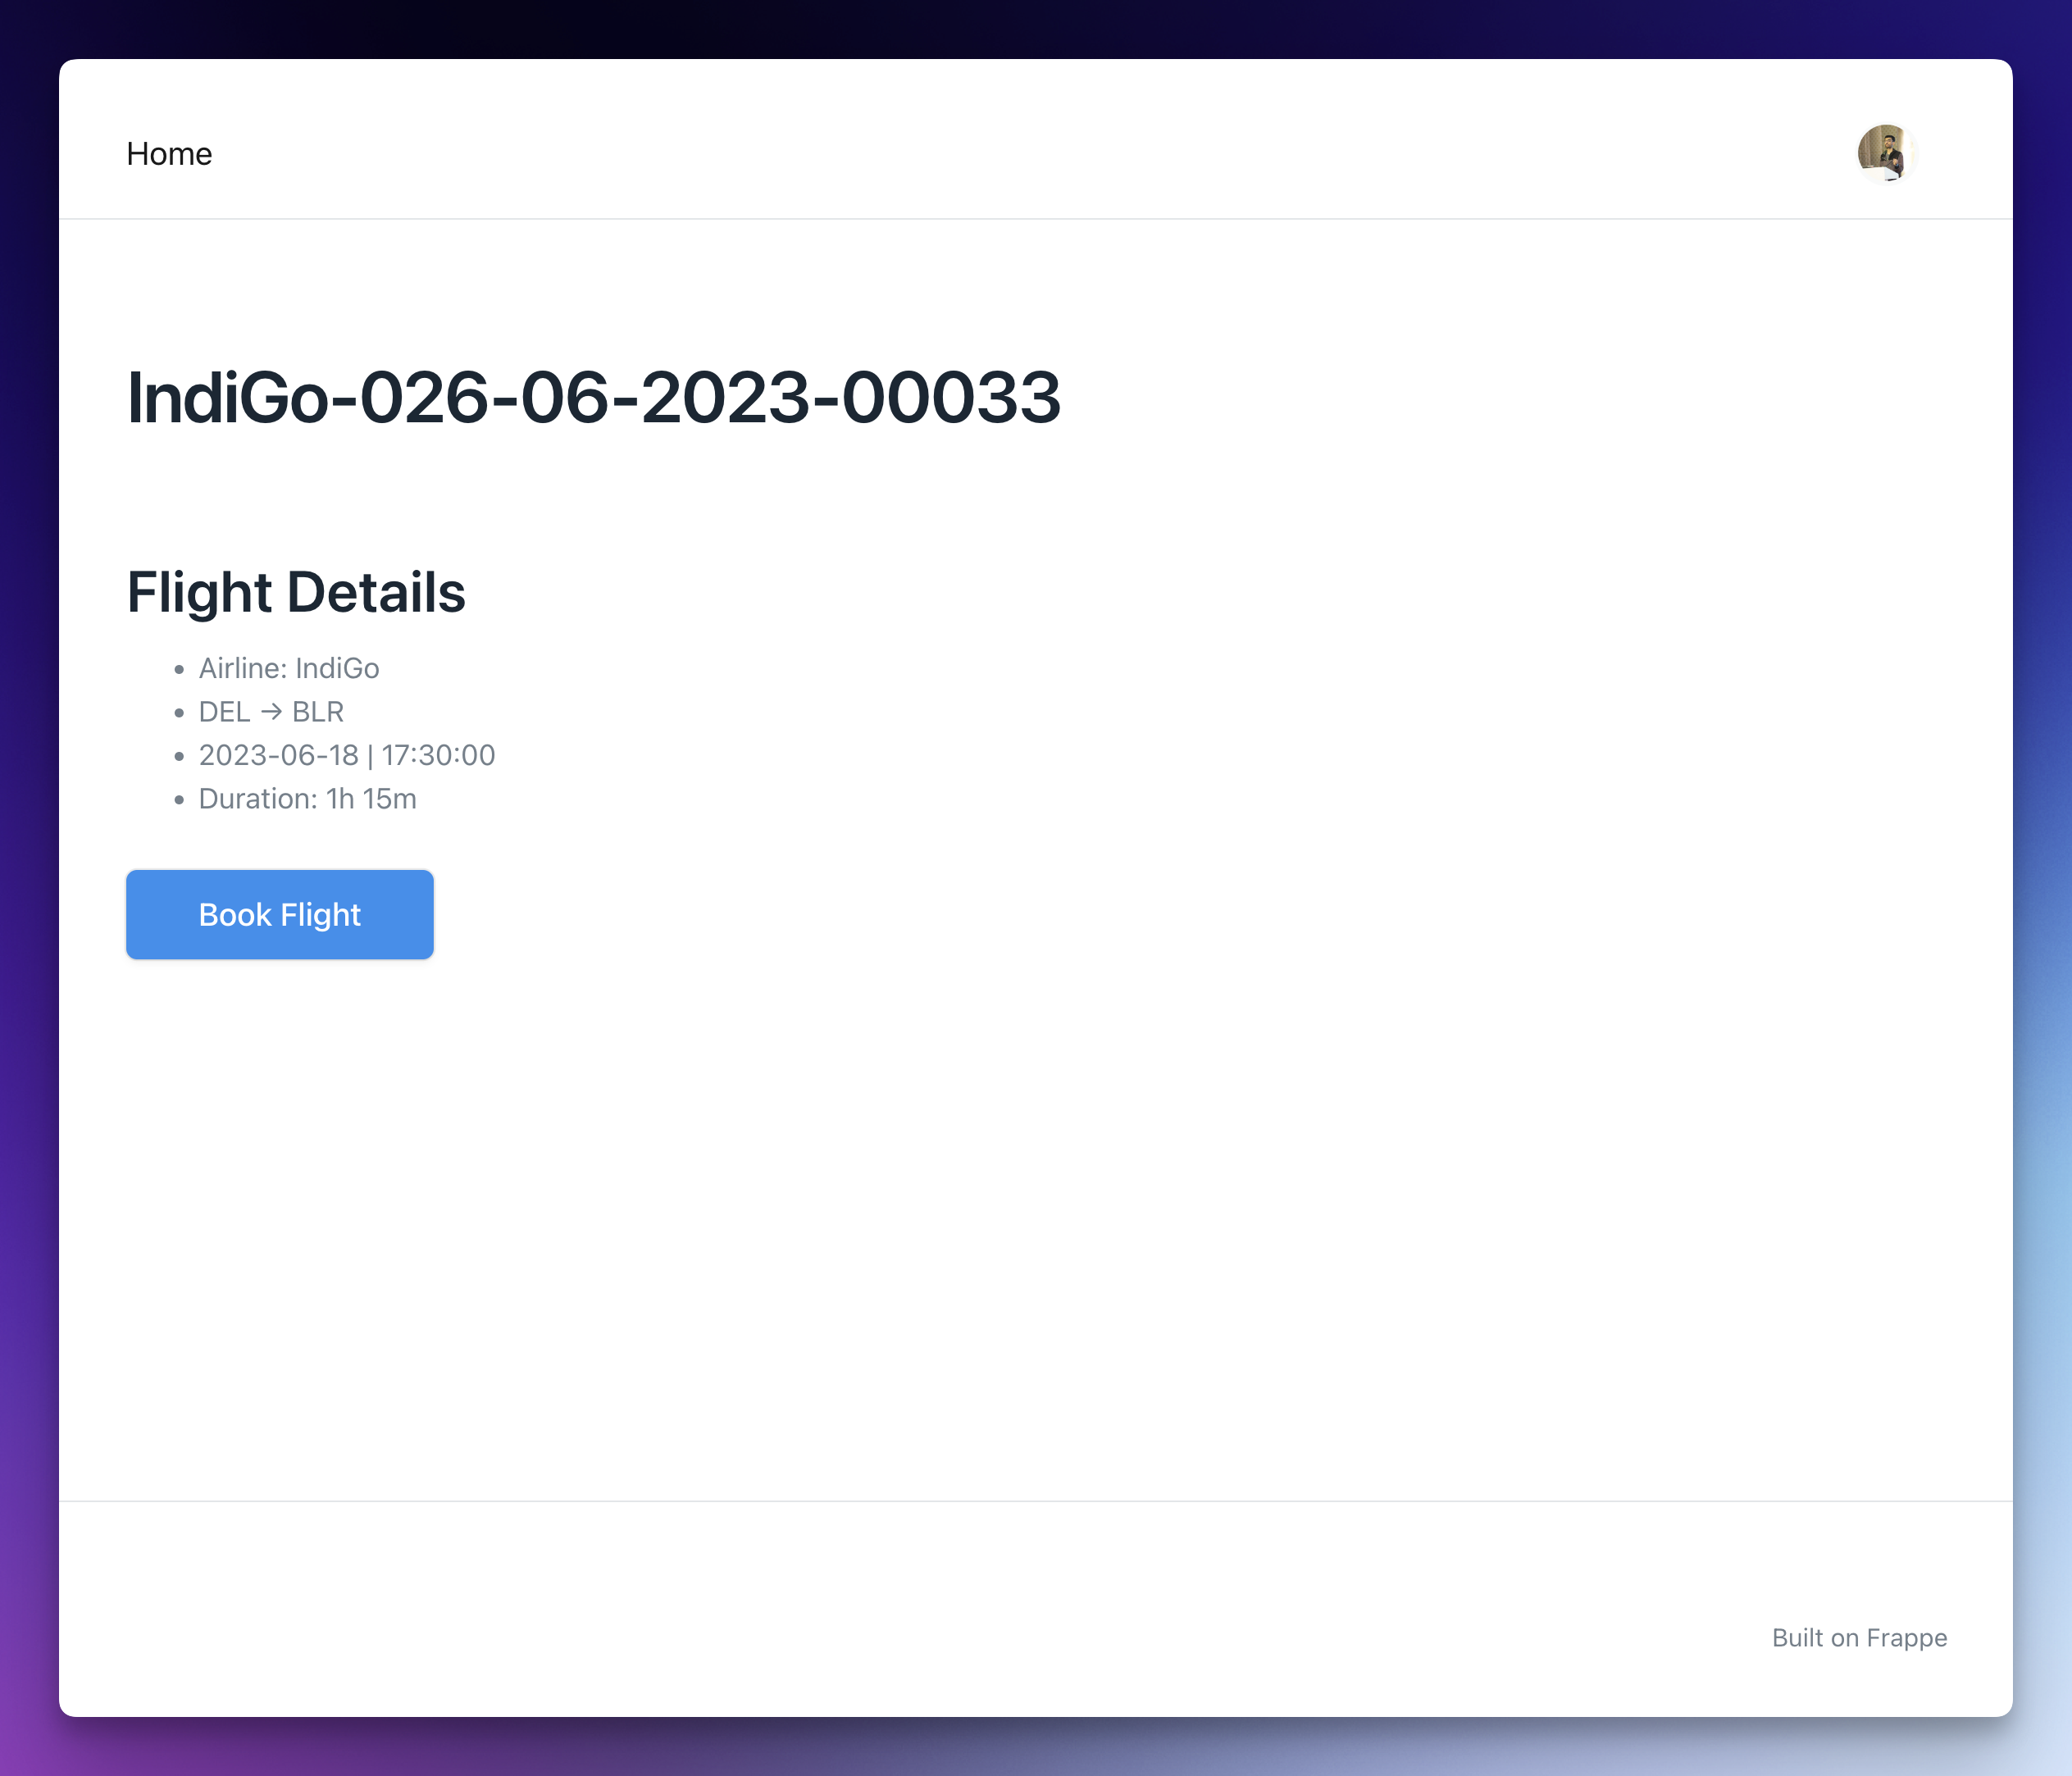
Here are some hard requirements for the web view pages:
-
The Airline, source airport code, destination airport code, date, time of departure and duration must be shown in the both the list page and the details page.
-
There must be a view flight link in each list item of the list page which takes to the main view.
Read the section below before building the jinja templates.
Frappe APIs in Jinja Templates
If you noticed, the Airline field is not present in the Airplane Flight doctype, but we are still rendering it on the web view pages above. So, how do we achieve this without adding it as a field to our doctype? Start by reading this page of the official documentation. As you can see, there are a lot of API functions available for you to call in your Jinja templates! Use an appropriate one to fetch and display the airline using the airplane field.
For example, to get the formatted duration field in the jinja template:
frappe.utils.format_duration(doc.duration) # 1h 15mAnd to get the formatted date:
frappe.utils.format_date(doc.date_of_departure, "d MMMM, YYYY") # 18 June, 2023Ticket Booking Web Form
Now, it is time to allow the user to book tickets! We will use Frappe Framework’s Web Form feature to do so. Here is how the completed web form should look like:
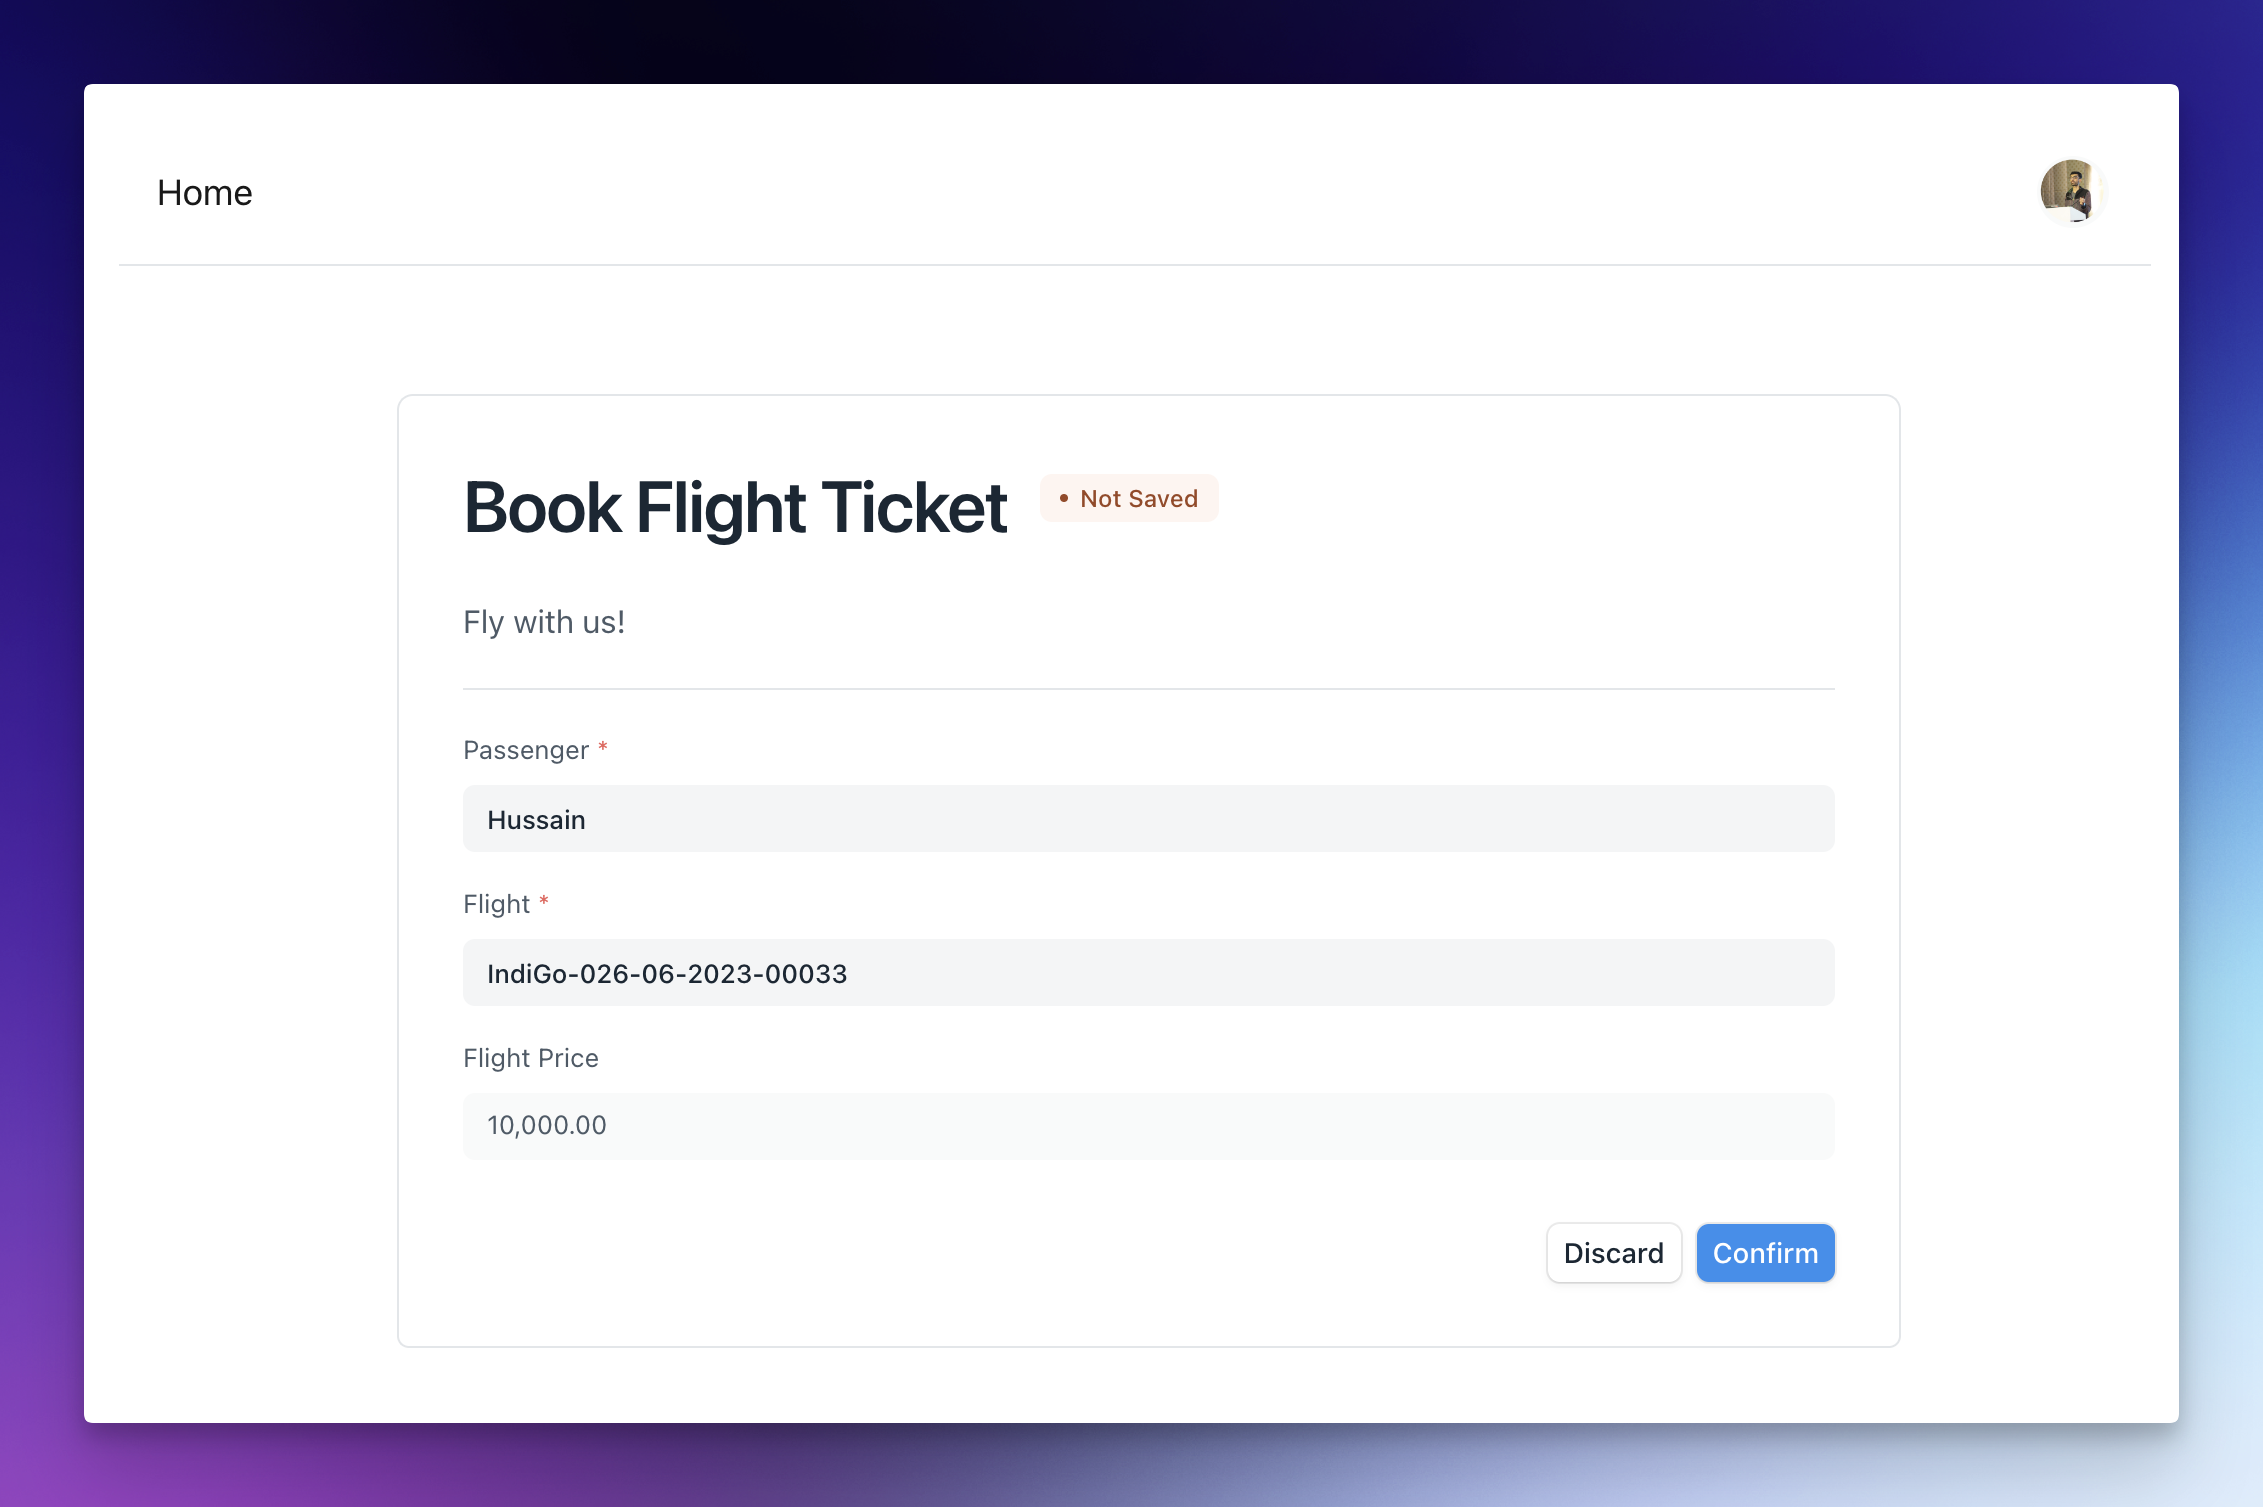
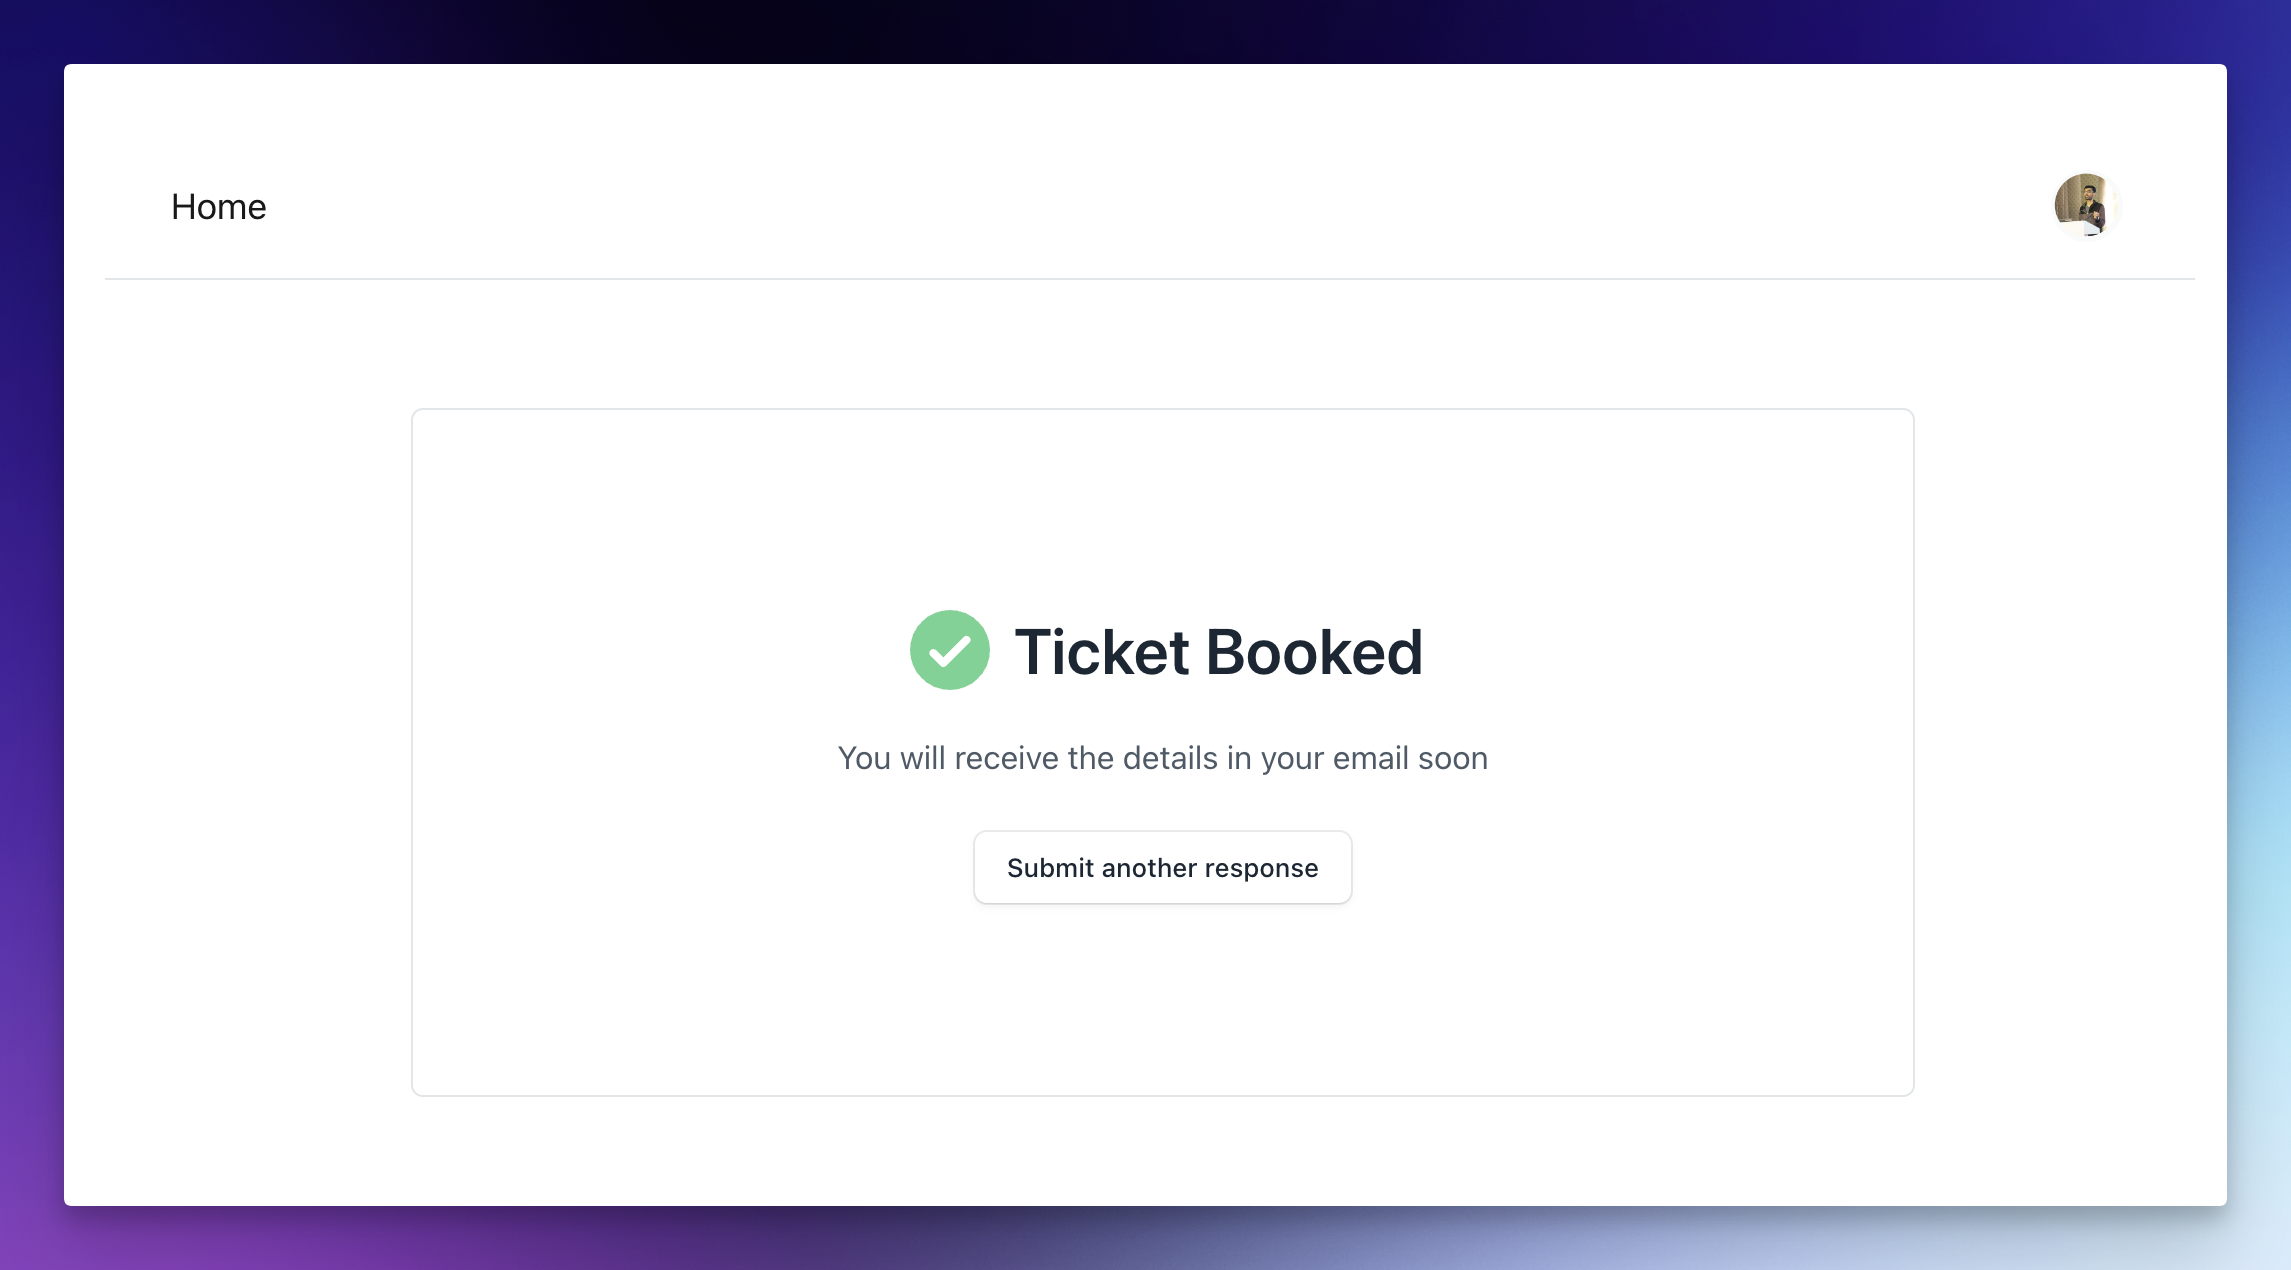
Here are some things to note:
-
The Title of the Web Form must end with Web Form (so that it generates a JSON file of the form
*web_form.json, which is essential for automated checking) -
This web form must be linked to the Airplane Ticket doctype
-
The flight price field in web form must be read only, it should be set (to any value you want) automatically when the user navigates to this page from the flight details page
-
The flight must be automatically set when the user navigates to this web form from the flight details page
Flight Departure Notification
Use the Notification feature in Frappe to send a System Notification to every System Manager 1 day before the flight departure date of any Airplane Flight where the status is Scheduled. The subject of the notification must be “Departs in 24 hours!”.
Make sure you check the Is Standard checkbox and set the module, so that it generates a file in your custom app.
Note: The Name of the Notification must end with Notification (so that it generates a JSON file of the form *notification.json, which is essential for automated checking)
Submission [Mandatory for Certification]
Go to your custom app where the files have been generated and compress the following files to a “.zip” file and submit below:
airplane_flight.jsonairplane_ticket.json- The HTML file that power the Show Me Colors portal page
airplane_flight.htmlandairplane_flight_row.html- The JSON file with the name of the form
*web_form.jsongenerated for the Book Flight Ticket Web form (look inside the web_form directory of your custom app, the name of the file depends on the title you gave to the web form) - The JSON file with the name of the form
*notification.jsongenerated for the Departs in 24 hours! notification (look inside thenotificationdirectory in your custom app) airplane_ticket.pyflight_passenger.pyairplane_flight.pypopulate_seats.py(the patch file)
Visit this portal to submit your assignment.
If you have any problems in submitting the assignment or find a bug in the portal, please drop me an email at hussain@frappe.io
Awesome! That is it for today, check out the optional challenges section for some open ended practice tasks!
Optional Challenges
You can do this after you have submitted the assignment:
-
Build a home/landing page for your flight booking agency using portal pages.
-
Advanced: Build doctypes and logic to assign proper seats instead of random seats.
-
Write a controller method to submit all
Airplane Tickets that are linked to anAirplane Flightand areBoardedon the submission of anAirplane Flightdocument. -
Create 4-5 Airplane Ticket Add-on Type documents and export them as fixtures.

